| Email John |
| Last update
12/09/2010
|
72 Volt Conversion

The most straightforward method of addressing this problem is to increase the system voltage. The stock 48 volt system can easily be upgraded to 72 volts without making major structural changes.
The Upgrade involves removing the contact controller and installing a 72 volt solid state controller, installing a "pot box" on the accelerator pedal, installing a 72 volt charger and installing 4 additional 6 volt batteries.
Space is at a premium in a Citi but there is room for the 4 extra batteries.
At the same time that I do the 72 volt conversion, I am also separating the 12 volt system from the traction pack, installing a 72/12 volt DC/DC converter to provide isolation and remove all grounds from the 72 volt system. A floating high voltage system is much safer than a grounded one because a single fault (through a wire or your body) will not cause current to flow. The 12 volt system gets a small 12 volt starved electrolyte battery to provide surge current.
I decided to put the two batteries in front to get some weight on the front axle. With my brake overhaul and the resulting good braking, the front wheels skid long before the rear ones start doing much braking. This extra weight on the front axle will help that problem.
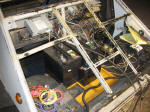
This project is currently underway so the photos below are to be considered "in progress" photos. I may change my mind about certain things before the project is finished. I'm putting these photos up now so that you can see the direction I'm headed.
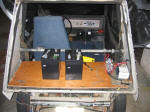
As of right now, I've decided to place two 6 volt traction batteries under the "hood" and two back on the package shelf. The problem in both locations is the same - the existing structure isn't adequate to support the weight.
I decided to remedy this by fabricating a strong battery support plate from high quality plywood. These plates span between frame tubes. No weight is placed on the plastic structures.
The plywood is made moisture and acid proof by first baking at 250 degrees in an oven to drive off any moisture and then thoroughly soaking the wood with a polyurethane varnish.


Rear plate in place. It is attached to the frame with self-drilling sheet metal screws. Ignore the controller and relay mounting in this picture. This is highly temporary.
A longitudinal support brace will be added to the center of the plate to catch the bow from the battery weight.
I plan on also mounting a small generator back here. Just in case!
